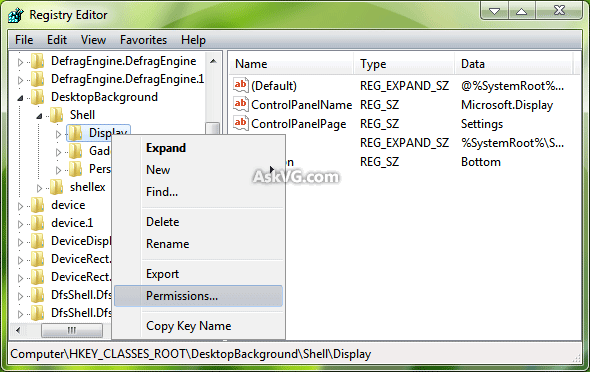
1. Type regedit in RUN or start menu searchbox and press Enter. It'll open Registry Editor.
2. Now go to the desired registry key, right-click on it and select "Permissions..." option.

3. It'll open a new dialog box. Click on "Advanced" button.

For Windows XP, Vista and Windows 7:Go to "Owner" tab, select your username and click on Apply button. If you also want to take ownership of the sub-key, enable the option "Replace owner on subcontainers and objects".

PS: If you want to get permission on all sub-keys, enable following 2 options in "Permissions" tab:
- Include inheritable permissions from this object's parent
- Replace all child object permissions with inheritable permissions from this object
For Windows 8/8.1, Windows 10 and later:Click on "Change" button near "TrustedInstaller" as shown in following image:

It'll open new dialog box. Now type your username and click on "Check Names" button. It'll automatically convert the username to correct format.

Now click on OK button.
4. Now select your username in first dialog box and check the "Allow" checkbox given for "Full Control" option.

5. That's it. Click on Apply and OK buttons and you'll now have full permission on the registry key.
No comments:
Post a Comment