28.3.19

How to Take Ownership (Permission) of a Registry Key in Windows?


1. Type regedit in RUN or start menu searchbox and press Enter. It'll open Registry Editor.

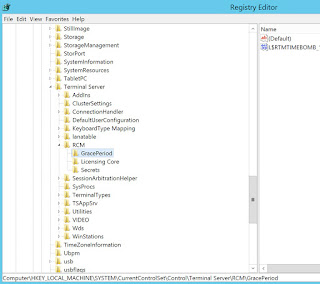
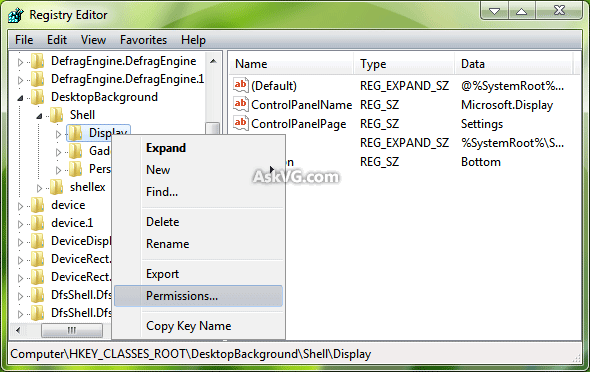
2. Now go to the desired registry key, right-click on it and select "Permissions..." option.

Select_Permissions_on_Registry_Key.png

3. It'll open a new dialog box. Click on "Advanced" button.
Change_Advanced_Permissions_on_Registry_Key.png
For Windows XP, Vista and Windows 7:
Go to "Owner" tab, select your username and click on Apply button. If you also want to take ownership of the sub-key, enable the option "Replace owner on subcontainers and objects".
Take_Ownership_of_Registry_Key.png
PS: If you want to get permission on all sub-keys, enable following 2 options in "Permissions" tab:
  • Include inheritable permissions from this object's parent
  • Replace all child object permissions with inheritable permissions from this object
If you are not a Windows 8 or later OS user, jump to Step 4.
For Windows 8/8.1, Windows 10 and later:
Click on "Change" button near "TrustedInstaller" as shown in following image:
Change_Owner_Windows_8_Registry_Key.png
It'll open new dialog box. Now type your username and click on "Check Names" button. It'll automatically convert the username to correct format.
Set_Owner_Windows_8_Registry_Key.png
Now click on OK button.

4. Now select your username in first dialog box and check the "Allow" checkbox given for "Full Control" option.
Take_Full_Control_on_Registry_Key.png

5. That's it. Click on Apply and OK buttons and you'll now have full permission on the registry key.

Windows Server 2012 - No Remote Desktop License Servers Available...


Sometimes on Windows Server 2012 (R2) Remote Desktop farm you start receiving error, "The remote session was disconnected because there are no Remote Desktop License Servers available to provide a license. Please contact the server administrator.", while trying to connect using Remote Desktop or Remote App .


The solution to fix this error is to delete a registry key related to Grace Period.

Open registry editor (regedit) and go to Computer\HKEY_LOCAL_MACHINE\SYSTEM\CurrentControlSet\Control\Terminal Server\RCM\GracePeriod

Delete GracePeriod key (folder).

Restart the server.


Note: remember you might have to repeat this every 120 days. 


27.3.19

The remote session was disconnected because there are no Remote Desktop License Servers available to provide a license


1. If you have RDS deployment, did you create a session collection and make your RDSH server part of the collection?
2. In Server Manager -- RDS -- Overview -- Deployment Overview -- Tasks -- Edit Deployment Properties -- RD Licensing tab, did you set the Licensing mode and add the FQDN of your RD Licensing server?
3. If this is a standalone RDSH server (i.e. you didn't create an RDS deployment via Add roles and features), did you configure the licensing mode and licensing server name using group policy?  For example, you could use gpedit.msc and configure the below settings:
Computer Configuration\ Administrative Templates\ Windows Components\ Remote Desktop Services\ Remote Desktop Session Host\ Licensing
Use the specified Remote Desktop license server     Enabled
Set the Remote Desktop licensing mode     Enabled

17.3.19

Get Active Directory Domain users accounts details...


Open Power shell in AD domain controller...

Get-ADUser -Identity "useraccount"  -Properties "LastLogonDate"

15.3.19

13.3.19

Print Spooler - Win 10

net stop spooler
del /Q /F /S "%systemroot%\System32\Spool\Printers\*.*"
net start spooler

12.3.19

Windows 10 default apps- Removal


To remove Windows 10 automatic installed apps from the system, please do the following.

1. Select  Apps & Features.

2. Select the app and click Uninstall.


Windows 10 Updates- OFF

1. Disable Windows Update Service in services.msc.
               In recovery " First failure" set to ' take no action'

2. Turn off Update Orchestrator Service.

3. In GPEDIT.MSC
               Computer Configuration .. Administrative Template ... Windows Components ... Windows Update
               Configure Automatic Updates -- Set to Disable.

4. Uninstall Windows 10 Update app from, control panel... Add or Remove Programs

High Disk Usage - Windows 10

1. Windows Search
net stop "Windows search"
Service 'WSearch'

2.Superfetch..
net stop superfetch
Service Sysmain

3. chkdsk /f /r

4. Remove temperory files

5.A.
In the Chrome browser, go to Settings -> Show advanced settings. Under Privacy section, uncheck the “Prefetch resources to load pages more quickly” option.

5.B.

Navigate to C:\Program Files (x86)\Skype\Phone\, right-click on the Skype.exe file and select Properties.
In the next step, choose Security tab and then click Edit.
From the list of “Groups or user names“, choose “ALL APPLICATION PACKAGES“, check the Write option to be Allow, which allows Skype to write to your disk.
After that, press OK.